Application Options – Behavior
Form Attributes
Clicking on “Behavior” from the Application Options menu will allow the user to select a number of attributes that will change the behavior of Autogenerated userforms.
Momentarily hovering the cursor over the control box will reveal a tooltip explaining the individual option.

The configurable attributes in this section are:
- Make Form sizable – This determines if the User Form and the Browse windows can be re-sized
- Confirmation Prompt Before Saving Data – When ticked, the user will have to confirm via a dialog box before changes are committed to the data Table, otherwise they are committed immediately.
- Moving to new record commits changes –If this is ticked, and there are uncommitted changes to the data, the changes will be committed to the data table when the user attempts to navigate to a different record. If the previous option was ticked, the user will have to click Yes to a confirmation prompt before changes are saved.
If this is not ticked then attempting to navigate to a new record when there are pending updates will result in a warning, allowing the user to move on without saving changes or to stay on the current record. - Continue adding after each new record – When a new record has been added and saved, a new blank form will appear if this option is ticked. If not the newly added record remains in the display, and the user can choose to add another by clicking New or Duplicate again, or choose to do anything else.
- Freeze top table row – This option will enable the top table row to remain “frozen” in place at the top of the display.
- Numeric text boxes as displayed on table – When this is not ticked, Auto ExcelForms will behave as many user forms including the built-in (hidden) Excel user form. Numeric values are displayed in their raw form. For example, the user will see 63.726 on the form, even though on the spreadsheet the display is $63.73 based on cell formatting.
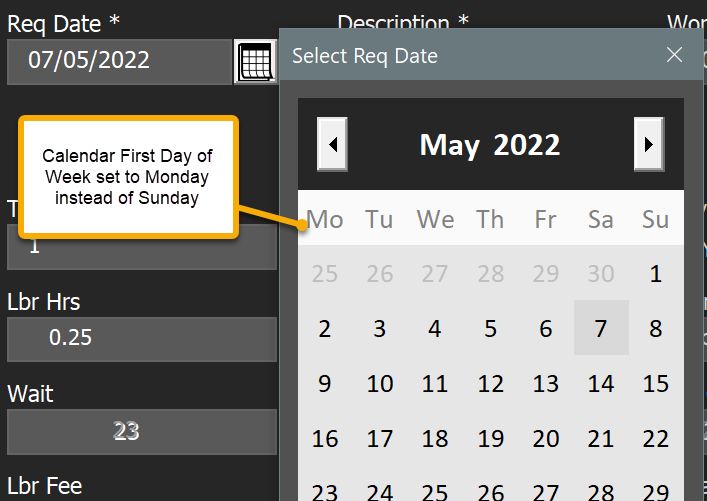
With this option ticked, you have the option of displaying the data as $63.73 on the form just as displayed on the datasheet. You should be careful with this however. In this case if there is discrepancy between what is displayed and the underlying data, and there is a change to any field for that record, the form will submit the form-displayed value $63.73 back to the table. (Auto ExcelForms will submit any data on the form that differs from the table for non-calculated fields.) In most cases this is not a problem since this usually happens with calculated fields which are read-only on the form, however the user should be aware of situations where this option may cause issues. - Calendar First Day of Week – You can set this to any value from Sunday to Saturday:
- Calendar Font Size – The size of the calendar also increases slightly with the font size. This option may be helpful in certain situations where the Display scaling is not set to the recommended value for a particular screen resolution. If the month or year label is not fully displayed, adjusting this setting should resolve the situation.
- Filter Feedback Bar – The setting here allows for having filter feedback:
Always = For any table on any worksheet
Temporary = Feedback Bar appears when the form is displayed, removed when the from closes.
Never = No Filter Feedback
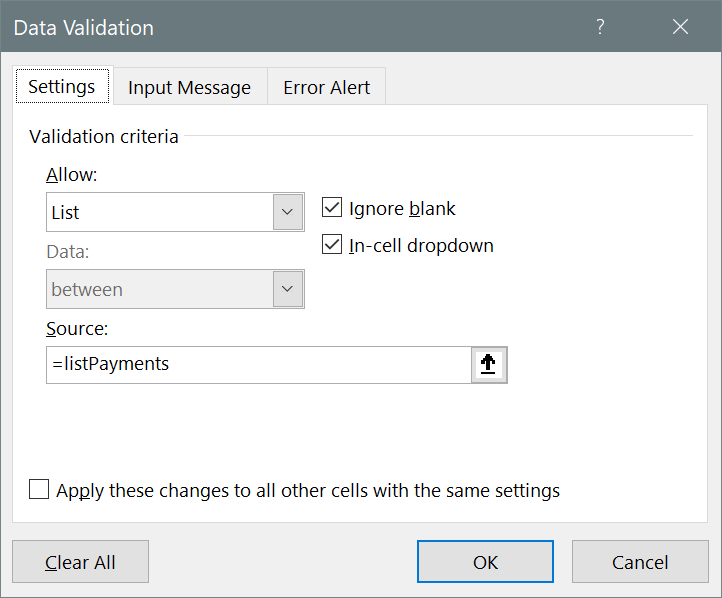
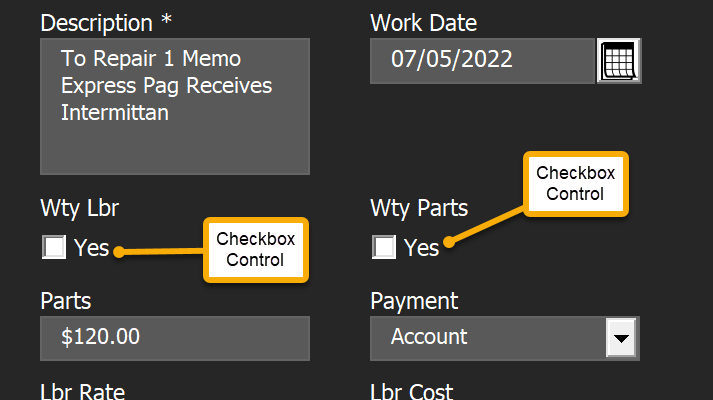
- Allow checkbox controls – In Auto ExcelForms the data validation rules for individual data columns can be used to drive how the form is built. For instance, if the data validation for a column is a list represented by any named range, (for example: =PaymentTypes ) Auto ExcelForms will build a drop-down combo box for that column.


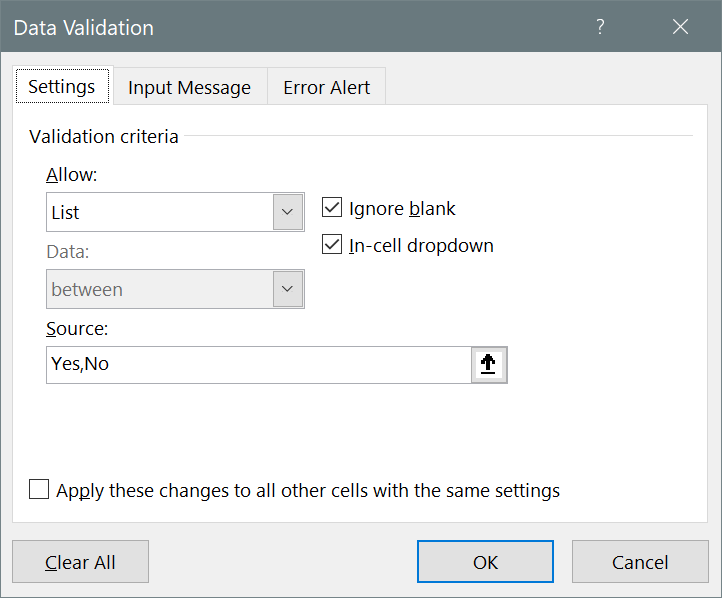
The same can be achieved by directly using a comma separated list in the data validation setup:


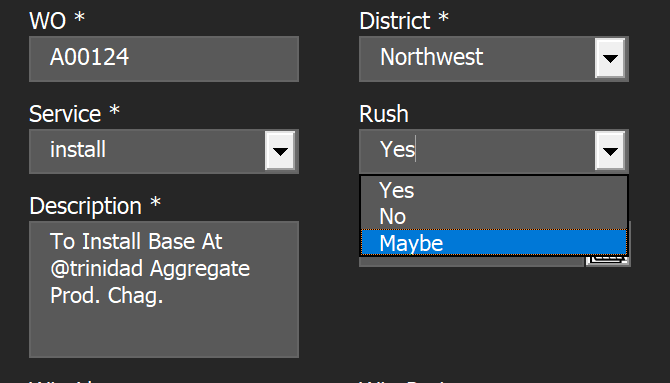
A list with just 2 values (e.g. Yes,No or Complete,Incomplete) would similarly generate a drop down box with just two values. However, by clicking Allow checkbox controls in options you have the option of checkboxes instead:

Primary Key Setup
Use this option to tell Auto ExcelForms that the first table column should be treated as a Primary key and if so, as an Autoincrement Key or not. You can also set up a column of keys for any table.
This section will allow you to do Primary key management.
A primary key is associated with a table column (text box on the form) that has two main characteristics, it cannot be empty, and must not be duplicated. It normally is used to uniquely identify a row of data. In Auto ExcelForms, an autoincrement key is a primary key whose value is maintained by the application. The primary key is normally in column 1 of the table.
With deference to some purists, Auto ExcelForms will allow more than one “primary” key, however only the primary key in column 1 can be auto incremented.
The primary key setup in this section deals with the main (column 1) primary key only.
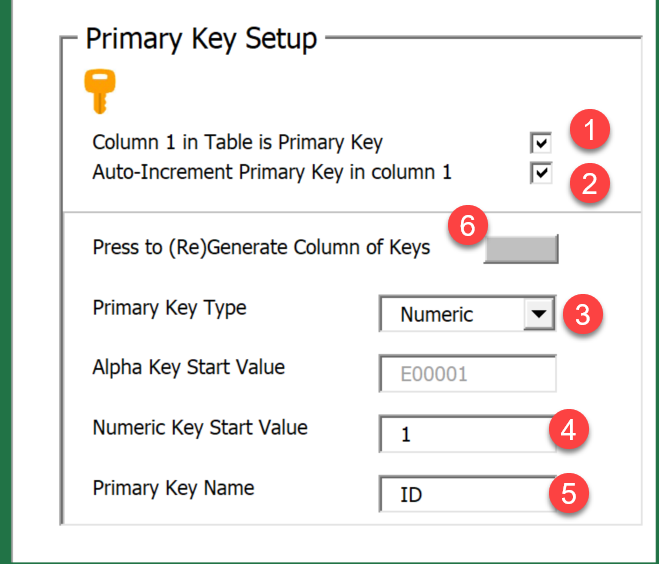
You can tell Auto ExcelForms that the active worksheet table has a primary key in column 1 by clicking the first checkbox(1). All additions and edits will be checked for duplications or blank values. By clicking the second checkbox(2) the highest key value will be incremented and used as the key value for each new table row added.
If you wish to generate a whole column of keys for an existing or new table, you can use the lower section of this form to do it:
- Specify if you want numeric values or alpha values in(3).
- The start value can be set in(4) .
- Specify the name of the table column to be used for the primary key in(5).
- If the Primary key name is the same as the name already there in the header of column 1 the key values will be regenerated for that column.
- If the Primary key name is not the same as the one in column 1, a new column with that name is added to the start of the table and the key values generated there.
Click the button(6) to generate the primary key column.
You will first be prompted to select a worksheet to generate the primary key.