Administration – User access and Logins
When first installed, the user has access to all the functionality of Auto ExcelForms. By default, the end-user has full administrative rights and there is no need to do anything further.
However, if you wish, it is possible to allow different access rights for others who make use of the add-in, in a very granular fashion.
You can, for instance, setup a user who can use the data form for adding and editing data but cannot do deletions of data records. You can, for instance, optionally control access to reporting, or setting up configuration options on an individual basis.
All this is done in Auto ExcelForms by using the “User permissions” and “User Logins” menu items on the ribbon. As an administrator, you can allow end users to select a user name and enter a password for access. Their access rights will be determined once they login.
The Admin Worksheet
Click on the User Permissions item on the Table form menu to bring up the access rights screen as seen below.
User Permissions/Access screen
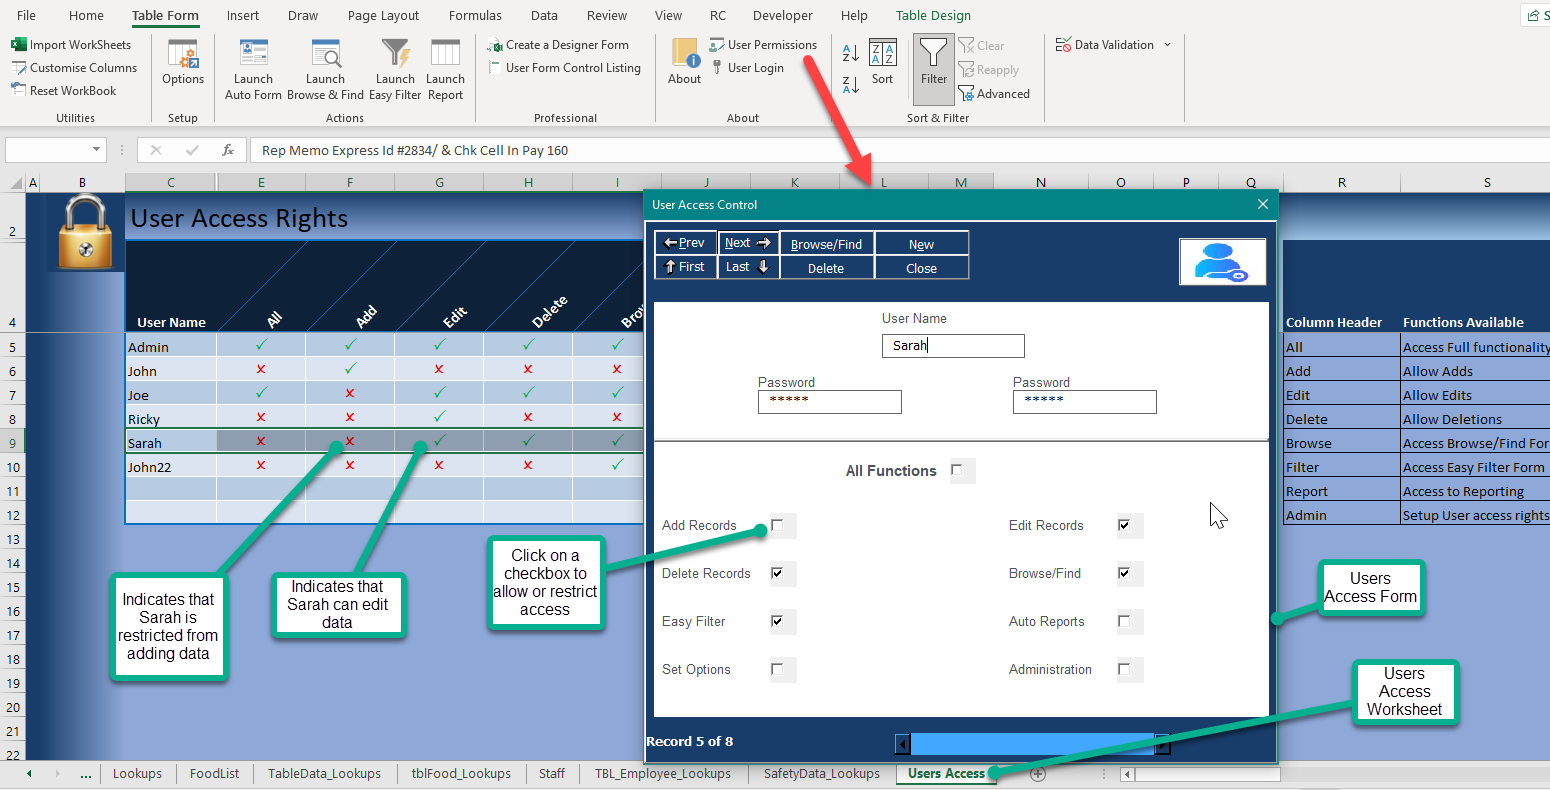
The first record (Admin) cannot be deleted or edited, except for the password. The default password for this Admin user is admin (Lower case). You can edit and use other existing entries as you wish. You can also add more if needed.
For each user, enter a name and password. This password is masked with a * in the usual manner for passwords. Passwords need to be at least 5 characters in length and are case sensitive. User names are not case sensitive.
The Login Screen
You can change what can be accessed within Auto ExcelForms by logging in as a different user, with credentials, established by the administrator (Section 11.1).
- Click “User Login” on the menu.
- Enter a valid username and password then
- click Ok or hit Enter on the keyboard.
The Login Form

Depending on the access levels assigned to a user, certain application menu items will be either greyed out or invisible.